Monday, July 31, 2006

Let the Plastering Begin! Introduction.

OK, now let me set the record straight. If you really want to rip out all of your plaster walls and lath so you can insulate or rewire your house, go right ahead! I would consider it for insulating an exterior wall but not for a rewire. For running wire you can cut out a 4" section across the studs at 20" above the ground, drill holes through the studs and run your cable, hook up your outlets and switches. Then you can patch the plaster using one of the methods that I will list.
Let me also state that I am not going to document how to do a complete historic replication of plaster walls. All that I am trying to achieve is a decent patch job so that I can smooth my walls with joint compound. My walls have been painted with several layers of textured paint. They have been poorly patched in the past and one wall was severely bulged. I hate textured walls. Textured walls are a simple solution for cracked walls. If I wanted to live in a cave I would have bought a cave.
For smoothing walls I use joint compound. Why? Because it sticks to anything, is easy to apply, dries overnight and is easy to repair any dings. Plus, acrylic paint sticks to it. If I were doing a historical renovation then I would use lime putty and calcimine paint.

There are two types of plaster. Gypsum plaster, also known as plaster of Paris and a slower curing patching plaster. This sets relatively quickly, in less than one hour. The trick to extending the cure time is to NOT stir it but rather to "sift" the plaster into water and allow it to absorb the water.Unfortunately, this is what most people use to fix cracks and dents and it ends up appearing as a ridge running across the wall or ceiling following the crack line because it cures too soon. It usually has a crack reappear down the center. Most old houses I have been in have them!
Then there is Lime plaster. Lime plaster is what has been used for centuries to cover walls and is most likely to be the culprit needing repairs in most old houses. Lime plaster can take many days to cure depending on humidity and temperature. If you want to speed up the cure time, add some plaster of Paris or patching plaster to the lime plaster mix.
I am going to use a combination of lime plaster and lime plaster with some plaster of Paris added in my patch jobs. There are two rules that you need to follow when doing plaster repair. Don't try to finish on the first application and don't try to make the patch flush with the rest of the wall until you apply the finish coat (which in my case is joint compound).
Mixing plaster is easy. I am NOT adding animal hair or string fibers to my plaster though I now fully understand why it is added. (More on that in a later entry). I haven't gone through the process of mixing up a bucket of lime putty either though I may do this for the "Hell of it" later this week when I buy another bag of lime since I have many other uses for it around this place. Plaster is hydrated lime and sand. A good basic mix is two parts sand to one part lime. More lime makes the mix more pliable. A scratch coat that needs to key to a surface needs to be pliable and you may even want to do a 1:1 ratio. A finish coat is just lime. A filler coat or "brown" coat is 4 or 5 parts sand. If you use gypsum in your mix, substitute it for lime.

Hydrated lime costs about $5.00 for a 50 lb. bag. It is called masons lime and can be purchased at a brick supplier. There is also a finer product known as finishing lime and even a pre-mixed lime putty but these are more costly. A bag of multi-purpose sand is less than $4.00 for a 70 lb. bag. A 25 lb bag of plaster is about $8.00 I think. I will know later this week when I buy one.

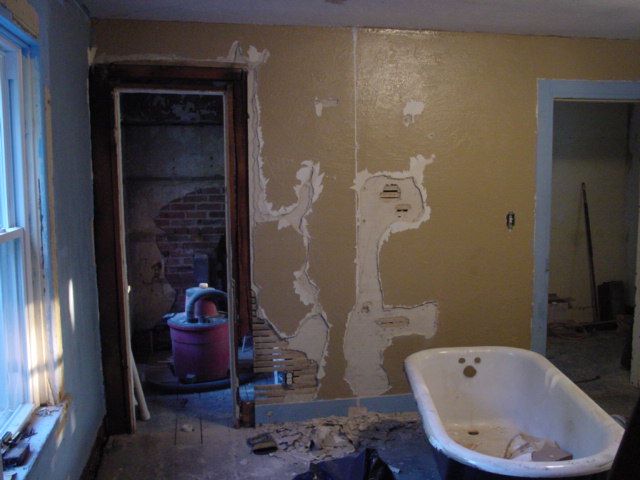
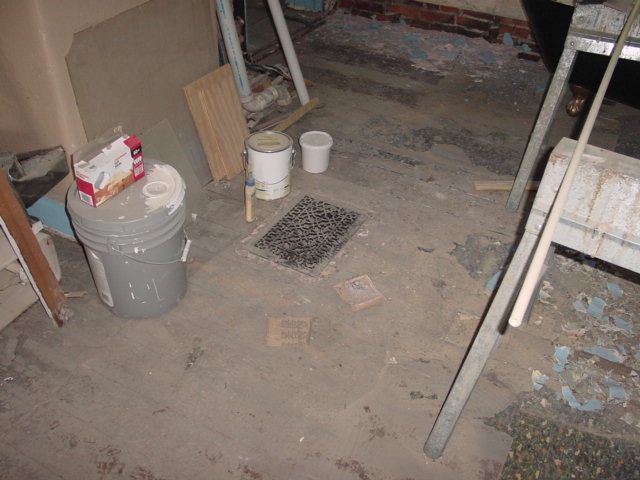
I started my repairs on Saturday using up some hydrated lime that I had left over and some sand. I did some of the easier repairs and let the plaster dry overnight. It took about 12 hours for the first coat to solidify enough to apply a second coat. I started with the repair of the chimney. At some time there was a woodstove in the room and the repair left a bulge in the wall. I removed the bulge with a chisle and had to remove the brick plug and replace the bricks and mortar. As soon as I did this I applied a base coat of plaster since I had soaked the bricks for the repair in water so they wouldn't suck the moisture out of the mortar or the plaster. After applying plaster to the brick surface and allowing it to set up for an hour while I plugged a few more areas with plaster I came back and scored the surface so that the second coat could "key" to it more readily.


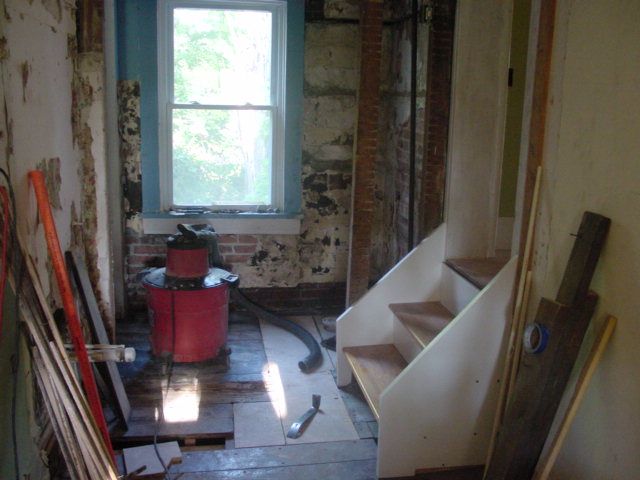
By the time I left the wall looked like this


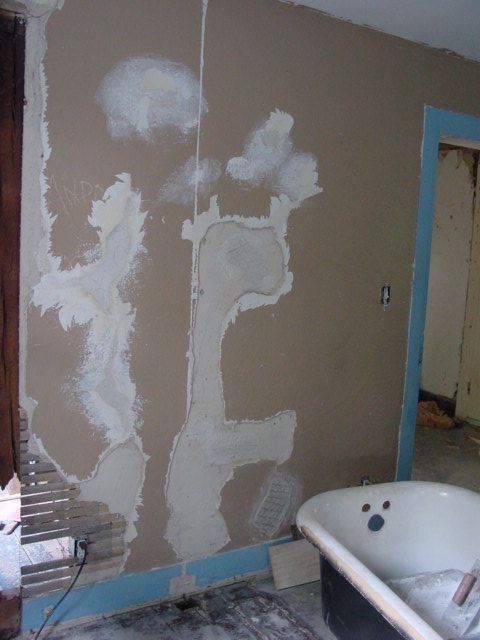
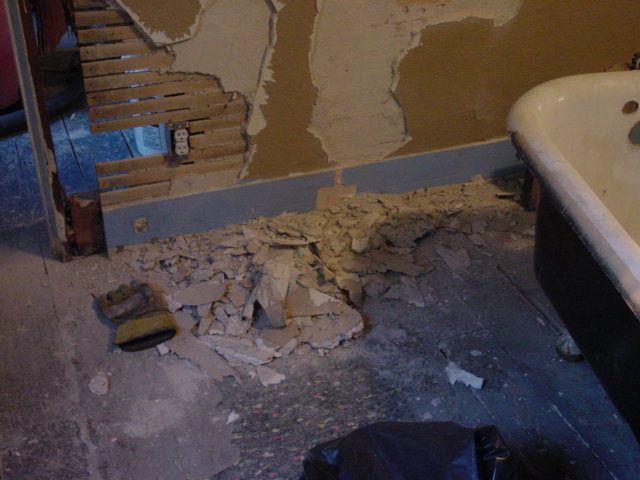
and I had done some repairs on the other side of this wall too with a hastily mixed up lime putty which was exhibiting some shrinkage cracks as it cured. The cracks can be smoothed out with a wet finger. Mine are going to get covered with joint compound so I don't mind the fine cracks. It is important to wet the area to be patched before applying plaster to reduce cracking due to the moisture being drawn out of the plaster.
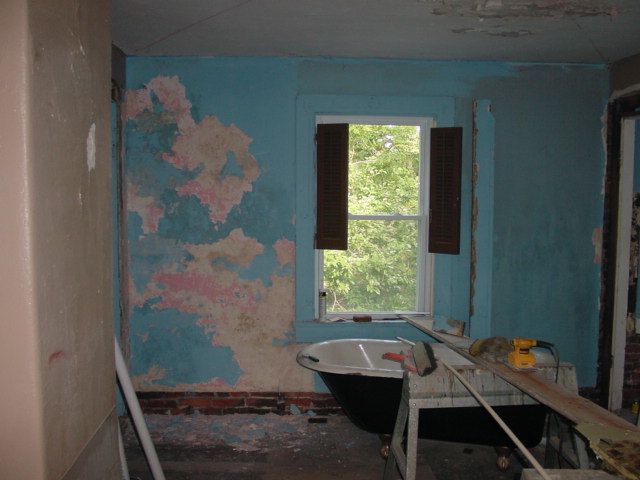
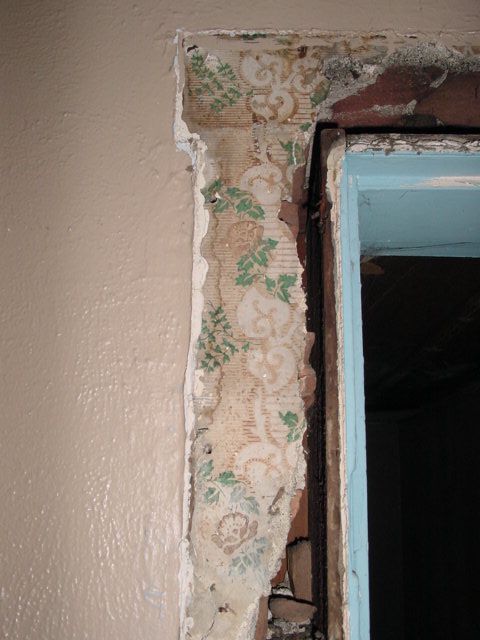
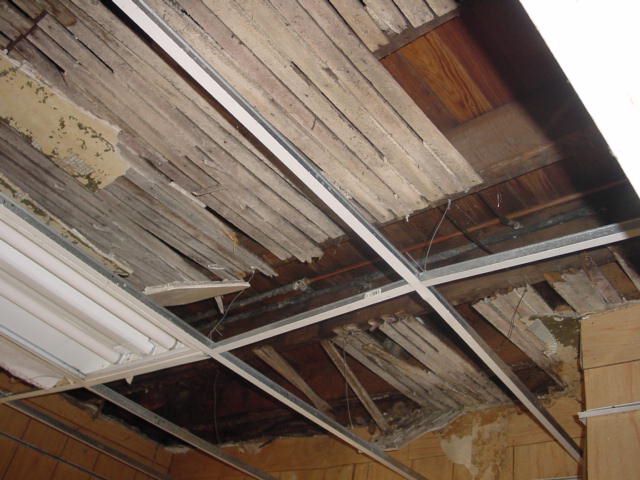
On Sunday I did some more plastering in between scraping ancient wallpaper from walls and ceilings. I'll show you those pictures later because they apply to the next post when I will answer the question about plaster repairs over exposed wood lath.
Maybe one day I'll show you all the types of wallpaper I have uncovered in this place.

Saturday, July 29, 2006

Repairing Plaster Walls

All too often I see people rip out plaster walls because they are cracked or have a bulge and replace them with drywall. Depending on the extent of the damage, it is often easier and cheaper to repair the wall and ceiling. Unfortunately, most folks don't know how to do this and speculate that it is hard work. I am going to be doing alot of plaster repair in the next few weeks and have decided to let you all in on the secrets of how to do this. There will be plaster on brick, plaster on lath and plaster on metal lath happening here as well as some drywalling next to plaster repair. Let me just add that doing all the plaster repair is considered the easy method of wall repair in my case because I plan to smooth out the textured walls as I have done in every other room so far. I need to get some hydrated lime, some sand and some plaster this week so that I can get started but let me show you what is prompting this crash course. I had a bulging wall that I thought would have to be removed and drywalled over. Before knocking all the plaster off, I decided to only remove the loose plaster. What I ended up with is this


This took me 30 minutes and only created this much mess! I threw in the glove for scale.


The scratch coat is still keyed to the lath in most areas so this patch work will be very easy providing I wet all the underlying plaster down really good.When I am ready to start the repair work later this week it will only take another 30 minutes or so. Now, putting drywall over that door frame and smoothing all the walls and the ceiling with joint compound will take much longer! One of these days I'm going to haul that clawfoot tub up to the third floor, too!
Stay tuned, you will never have to gut your walls again!

Friday, July 28, 2006

The Room You Haven't Seen Yet

Any time we want to "remember" what this place was like when we bought it all we have to do is go upstairs on the cottage side of the house. These rooms have remained fairly untouched since removal of the odoriferous carpets and the prying up of some previously removed floorboards in order to rewire the place. The walls and ceiling have remained in their pristine condition for the last 5 years! That is about to change and so I thought I should take some pictures because we have very few of these rooms.


This is a small bedroom next to a room that was a passageway to the balcony and that will become the laundry room with a powder room adjoining it. In 1845, this 10' X 15' room was the servants bedroom. There is evidence in the floor boards that there used to be a steep stairway leading to this room from the one below which at that time was the kitchen. It still has an original 2-panel door and its original 1840s hardware.


It still has the original heating vent which was no more than a hole in the floor above the fireplace.


We also have evidence of the original wallpaper.


Preserved for us to see because it was covered by molding after this door was knocked into the wall when someone added a second storey to create the adjoining room.


What do these pictures really say? Well, first and foremost, for most of you readers, they say "The rooms in your house aren't nearly as bad!" Then they say "He's crazy if he thinks he can turn THAT room into a livible condition!" and finally they tell you that I lied about smashing the worlds heaviest bathtub with a sledgehammer and I really, really like moving it around the room as I work in it!

Thursday, July 20, 2006

The Next Project Begins

I never get to finish one project in it's entirety. The idea here is to get the place done to a point where we can move in and dust and lead paint levels are reduced so as not to harm Elizabeth, though a little lethargy might be a good thing at the moment! So, now that the floor is done in the parlor, I have been instructed by the "Boss" to make the laundry room ready. This means install the two steps at the foot of the door that separates the big side of the house with the little side on the second floor. Put plywood subflooring down where boards are missing in the floor from early plumbing, re-arrange the water lines in two locations so that they serve our needs for a sink and a washing machine, build a low wall and shallow build out to conceal a 4" exhaust duct, a gas line and some electrical cable then put some backerboard down so a tile floor can be installed some day. I guess I should repair and smooth out the plaster walls while I'm at it.
This work actually began before our Brimfield trip. I got the holes in the floor filled and then proceeded to rip out some plaster and lath and some 1950s glitter tile that donned the walls in the bathroom area adjoining what will become the laundry room. When we left there was a pile of rubble on the floor. When we returned there was still a pile of rubble on the floor, so those stories that Greg tells about fairies aren't true. At least not in Ohio unless they have become organized and formed a union.
On Sunday after our 15 hour return trip I had the pleasure of filling three bags with plaster and broken tile then vacuuming the room while humming childrens songs in my mind. There are only so many times one can listen to "Little Bunny Foo-Foo" on a road trip before wanting to bop ones self on the head!
It is nice to finally have some steps installed though. Using that old tub of joint compound as a step for 5 years was getting to me.

Here is a before Brimfield picture of the room


and here is the after plaster clean up shot.


Proof that sometimes things have to get worse before they get better.
I get the thrilling experience of working on this room for the next three days. Woo-hoo!

Monday, July 17, 2006

The Brimfield Experience

Years ago, about 13 in fact, I worked for an auction company for a little over a year. One of the auctioneers used to set up a booth at "Brimfield" every year and said that it was a "must see" kind of place. Many years passed and I saw an article in Better Homes and Gardens mentioning it and made a comment to Deborah that we ought to try to go some day. Well that day finally came. We loaded up the car and headed out to Massachusetts on Monday with the idea of arriving sometime on Tuesday. The trip is around 800 miles each way for us here in Ohio and I calculated that the minimum travel time was 12 hours. If you add in the "Elizabeth factor" and how many times she can say "I need to go pee-pee" and "Are we there yet?" in an hour then you are going to understand why the drive home took 15 hours.

We went with an open mind and nothing specific to look for.
If you are not familiar with antique/flea markets then Brimfield will be overwhelming for you. You cannot see the entire set up in one day and the way it works is a little strange. Basically there is a one mile stretch of road on Route 20 between the towns of Palmer and Sturbridge that is within the boundary of Brimfield. On each side of the road are privately owned fields that dealers pay at least $100 a day to set up a booth in. There are many fields and some open on different days and could be closed on the day you chose to be there. Upon opening they charge a $5 admission in some cases though the admission charge seemed to be waived after noon on opening day and on subsequent days. Some dealers move around so that they are in the new fields on opening day. I guess people are paying the admission fee to get the pick of the crop if they arrive early. Some of the fields are open at 6 AM others could open as late as noon. Due to much rain and what appeared to be a low turnout of buyers (due to gas prices, weather and vacations I guess) many dealers packed up around 2 PM on various days and left. Regardless, there were lots of dealers. Probably thousands. There are three shows a year here. May and September are better attended than July and Saturday is the busiest day.

We are familiar with what things are worth though we are not experts and were surprised that the prices at this show were actually reasonable. Some were better than reasonable and some were insanely unreasonable but in general prices were very fair.
We started our quest for things that catch our eye on Wednesday and vowed to pay no admission fees. We were distracted at the very first booth.


By the end of the day we had spent $10 and were wowed by one beaded hanging oil lamp for $400 that we didn't need but would look really good in the parlor because it had more bulk than the one we bought due to the fact that it had holders for 9 candles attached to it. I suspect it was from France or Belgium. We didn't buy it and it was still there when we left on Friday. Elizabeth was testing our patience all day and when she finally fell asleep it poured with rain and we couldn't walk around and look at stuff.


Thursday we got up early to arrive before 10 AM and we started off where we ended up on Wednesday. By lunch time it was raining again and we were stuck under the huge rug dealers tent where we ate our lunches. Elizabeth became quite infatuated with one of the rug dealers. While there we got to look at all kinds of Persian rugs and ended up buying this one.


It wasn't cheap but it was a fair price for a hand made traditional rug. We got it for two reasons. The first being that we liked it and the second was that we don't see many round rugs and I have never seen one at an auction. This thing would certainly be the center focal point in whatever room it goes in. We got it with the main living room in mind but are more likely to use it in the "cottage" living room because the room is smaller.

Elizabeth did very well, she was showered with free stuff by various dealers and as this series of pictures shows, she made a lot of new friends!


She even got a head start (by several years) for the "Daisy Duke" look-a-like contest!


Friday we did very well. We stopped at a field several miles before the main Brimfield show where there were rows and rows of boxed lots and everything was $1 each!

We were there an hour and spent $24 on 24 pieces of stuff. The most useful item being a Griswold 6" damper for a woodstove which we need. Otherwise nothing worth photographing. We proceeded to the main show area where Deborah bought a "gozunda" for $20. In actuality it is a chamber pot. Called a gozunda because it goes under the bed. She has always wanted a toilet in the bedroom. This was the most affordable option! Once she told me she wanted something that would go from 0 to 150 in three seconds. When I bought her a bathroom scale I was sent to the doghouse for a week....

So when all was done on Friday we went to Applebee's in Sturbridge were we had arranged to meet The Fixer Uppers and Brockton bungalow bloggers. It's like meeting a local celebrity or someone you've read about in a tabloid! We spent at least two hours yapping about house related stuff while 3 year old Elizabeth and 5 year old Celia played waitress crawled under the tables and strolled arm in arm around the aisles before, during and after eating macaroni and cheese with ketchup. After the Brockton Bungalow Brood left we got to experience another Elizabeth moment (coniption fit). This time the police were not called out and I am now on the lookout for a late model broom that I can restore for her in time for her 16th birthday!

We are thinking about returning to Brimfield in September 2007. So, if you think you need an overdose of antiques and want an excuse to possibly meet other insane renovators, you have 14 months to prepare for the trip!

Sunday, July 09, 2006

Answers to Stupid Keyword Searches Linking to my Blog.

So, we are all addicted to sitemeter. At least those of us that use it. I get a real kick out of some of the keyword searches. Lately there have been some real doosies. I need to post the answers here so that people looking can end their search with this blog!

There are always people asking "What does Crack smell like?"
So let me answer; That depends on what crack you wish to penetrate with your proboscis.The aroma could range from anchovies to roses so you might want to be more specific with your search if you want to avoid smart ass comments like this.

"What does a Crack House look like?" That is easy, do about $50,000 worth of interior damage to your house, cancel the utilities and nail some plywood over the first floor windows then run outside and take a picture! That information just cost you $50,000. You could go out and smoke a "rock" and in six months you will have the same result except that you will no longer be employed so the repairs won't be happening and the repair bill will be the responsibility of the person typing " Pictures of a Crack House?"

Then there was "House built of turds" um, people, come on. The title says This Old Crackhouse, not "This Old CRAPhouse". Go shit some bricks and build your own!

"Spanking your Monkey?" alright, someone really has a problem here. Next I'll get hits from "Choking the dolphin" or "Flogging the Lizard". You need to stop watching Jerry Springer and go outside more often.

"Pictures of Pigeons Crapping?" Huh?!!!!! Yeah, I tried this once when a pigeon crapped on my face while trying to get the money shot with the camera. I asked my friend for some toilet paper and he said "but it will be miles away by now."

"What does raccoon poop look like?" Is this a course in high school or something? Why does someone need to know what raccoon poop looks like? They look like little piles of people turds if you really must know.

"Bum Phuck Egypt?" This is where the soPHisticated people get lost. Everyone else gets lost in BFE.


What is REALLY scary though are those people who are finding this site by typing in my name. Makes me wonder who is looking for me. I hope it isn't someone trying to return the ex-wife!

Friday, July 07, 2006

My Neighbor is a Moron- The Epilogue

The house next door to my residence sold! Hooray!
Do you remember the "My Neighbor is a Moron" story? About the waterfall in the kitchen and ice skating in the basement? Well there is an ending! Last week some people were looking at the house. I stopped out and told them about the water so they would understand why it looked the way it did inside. Obviously they were not put off by the damage and bought the place. They have already sold it to a young guy who will be fixing it up to sell for a profit. My guess is that the people I met paid cash for the place, then turn around and finance it to some up-and-coming Charlton Sheetz wannabe. Either way, my house value just went up $5000 when I try to sell it to move into the "Crackhouse".
They let me in to take pictures of the water damage so I can show the world what happens to a house when the owner is a moron!