Tuesday, October 30, 2007

Hole be Gone!

Another milestone has been reached!
I am no longer in the hole collection business! These two holes were finally filled with bricks and plaster and have already been covered with a coat of joint compound. This picture was taken Friday after the first coat of plaster was applied.


The two comparable sized holes in the bathroom immediately above this room have been filled and are in the process of being smoothed out also. That means that by the end of the week these two rooms will be ready to finish, but I don't know how long that is going to take!

Friday, October 26, 2007

"The Effects of Living in a Crack House"

Someone in Tennessee Googled "What are the effects of living in a crack house" today and came upon this blog. They didn't hang around long so it must not have provided the information that they were searching for. It got me thinking though, what have the effects been of working on this place?

Well, besides the obvious loss of memory, hearing and eyesight, the constant twitching of the upper right eyelid and the slurred speech. Let me think. Ah yes, thinning and greying of hair, a burning desire to finish the place so that I can relax some day, constantly being alerted to the background and stage props in movies. Then there is the persistent search for hardware and light fixtures on EBay. The constant craving to experiment with construction supplies like Portland cement and sawdust. Oh, and the reading of books that contain antiquated words like laudanum.

Of course there is the addiction to denatured alcohol and masons lime as well as shellac becoming my drug of choice. I constantly smell like boiled linseed oil to mask the odor of raw sewage or PVC cement. Then there are the dry hands from pushing blobs of lime mortar into cracks that my tuck pointing tool can't master. Cuts, bruises, smashed finger nails, black gooey boogers when I blow my nose. I have all the tell tale signs of being a renovation junkie! I'll have to enter a ten step program and memorize the serenity prayer. Now that I have come to this self realization, I think I need a beer.

Then someone in Alabama Googled "Crack House Rules", you don't want to get me started on those!

Wednesday, October 24, 2007

More Fun With Concrete

The last few days have been spent doing many things including pouring a concrete wall for the side of our exterior stairwell to the basement. You may remember how it looked back in March and then in May when I dug it out. Well I had to do a bit more digging and as I dug deeper, the foundation wall around the door frame fell apart. It had been stuck together with bricks and some type of caulk compond from the inside. The other side of the door looks the same way so it it is going to be a blast fixing that wall in the future. It would appear that the stone and brick walls on both sides of the stairwell had been slapped together more recently than 1845 and most likely between 1954 and 1988 by that previous owner. The same one that turned the place into apartments. The top step which consisted of two pieces of limestone with concrete in between also needed to be replaced since all my digging loosened the stones. Currently the stairwell looks like this


It may be the angle of the camera but it is nice to see that my allignment on that top step is just as wonky as the rest of the stairs. Who knows what it will look like when I pull off the wood planks!

Wednesday, October 17, 2007

Making a Concrete Sink (Part 1)

When you tell people you are making a concrete sink for the bathroom, they look at you with a strange expression. This is because when I say concrete they envision the sidewalk outside their house. So, don't look at me with that strange expression any longer. I am going to take you on a journey with me as I attempt to make a piece of art for our bathroom.

Half the problem with making a sink is figuring out how to make a mold. You have to be able to picture the finished item in your mind and also how it would look in a reverse form. The materials used for our mold are simple pieces of left over melamine board and 1 X 2 pieces of lumber, packing tape and screws.

My first attempt at making the sink didn't work and I can walk you through the process and explain why. When I made it, I quite expected certain elements not to work so I wasn't going to be upset with the end result if it failed. As it turned out in the end the sink would not have sat properly in the allotted space and we didn't like the way the counter top turned out so we would not have used it.

The things I thought would be a problem were the depression for the drain and the way the color would turn out. I also had some worries about dismantling the mold which ended up being my biggest problem. I used a bag of cement that had been sitting on the floor in the kitchen for two years also. I didn't know if it would actually be much good but with so many "ifs" hovering over the project I decided to use it instead of buying a fresh bag and being disappointed with the result.

When you design a mold that produces anything but a completely flat surface you have to anticipate being able to dismantle it or remove any build-outs with ease. I used a combination of melamine and Masonite panelling for the basin build out but managed to place the screws on the concrete side of the mold which would make their removal impossible. I caught this early on and thought I could solve the problem by not screwing the back part of the build out to the sides. I also anticipated that pulling the rest of the build out from the concrete would be easy. That was wrong. I didn't take pictures of the mold as I built it but here is the entire thing after the concrete was poured.


I have two concrete dyes at the house. Black and terracotta. I decided to see if I could create a marbled effect in the concrete and so I mixed two batches of different colored concrete and placed them in the mold in such a way as to create a mottled pattern. I had no idea if this would work and whether the entire thing would turn out as a brown mess. I have one other problem, that is polishing the inside of the sink basin. My variable speed grinder and polishing pads won't have enough room to work in a narrow basin and this problem is why I opened up my mold after only a few days because I figured that I could use "wet and dry" paper on the basin interior while the concrete was still relatively soft.
Getting the exterior part of the mold apart was easy as this picture shows in part


When it came to removing the basin part of the mold I found that nothing would lift out. The unscrewed back had shifted forward slightly allowing concrete to form a slight bulge on the sides. Although the back piece could be pushed forward and wiggled out, the side pieces were too rigid and would not budge. So I had to use a pry bar and apply some force, a lot of force in fact and that caused the entire side to break away. This made getting the rest of the build-out much easier to do but rendered the sink useless. So I used the broken piece to experiment with. I applied the grinder to the surface to get an idea of how the polished surface could look. I used my "wet and dry" paper on the basin side to see if it would work and it did but if I can duplicate how the basin interior came out I won't have to. I will have to construct my basin build-out from a less rigid material such as styrene for the next attempt.

Before you see the pictures let me tell you what we like and don't like about the results. The drain depression worked perfectly for the drain I bought. I will describe what I did in a future post. The interior of the sink came out smooth and shiny. It is also marbled perfectly and requires just a few voids to be filled with a colored slurry. We really like the way it turned out and we like the color result. The counter top is another story. It is too chunky in the right corner with red color and looks unnatural. However, the ground surface with the black coloration looks great and very similar to our kitchen counter top. If the counter top and front was black and ground down a little and the basin marbled and smooth we would have the perfect combination. The entire sink sits 2 inches too high on the base. This is because the slope of the basin does not clear the wood frame of the base to sit the the air space that I have. For this reason alone I would have to make a new sink any way. So overall this was a good experiment. So, here are the pictures you have been dying to see!

The entire basin with drain resting in place minus the entire left side.


The left side with a ground surface to show aggregate in the concrete.


The gap at the base of the sink and the frame.


And finally this!


The start of a modified mold. I have raised the sides by the 2 inches that I need to eliminate that gap!
I will be sure to take pictures of the entire process as I make the spawn of the spawn of E.L.V.I.S.

Tuesday, October 16, 2007

Goin' Down To South Park...

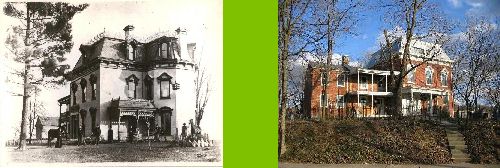
We have a neighborhood adjoining ours called "South Park." This is the largest historic district in Dayton. It has taken about 20 years to turn the neighborhood completely around but it is now a cool neighborhood to take a walk in. This week is their "Rehabarama." This is basically a showcase of homes that have been renovated and are being put on the market for sale.

Elizabeth and I took a walk down there last night to view the homes. There are 10 open for the tour but every real estate agent with a South Park listing is having an open house as well. The homes that are done look very good and have been decorated well by area interior designers. I wish I could have had more time to view each house better but Elizabeth was being a whirlwind and I couldn't keep up with her!

I had only one criticism though and it is quite a major one. Knowing what I know now about restoration, renovation and repairing old homes, I was disappointed in the quality of some of the workmanship done on many of these grand homes by so-called professional contractors. Besides some of the drywall seams exhibiting cracks, the floors in a few homes were sanded old growth yellow pine and they were polyurethaned leaving a natural finish. A coat or two of shellac would have made those floors say "WOW" instead of "Blah." One house had the stair rails replaced with new wood that was stained with walnut stain to match the walnut stained floors. The wood was ornate for modern standards but the wood hand rail was rough to touch and therefore unfinished. It looked OK but it wasn't a professional job. One property owner made a comment that it is difficult to find contractors who are willing to work on old houses because things aren't plumb and level, framing isn't standard and they just don't like to work on them. I also think some of them rushed to have the houses ready to show on time. It is a shame because if you click on the above link to read about the houses you will see what kind of price they are asking for them. Of course, like most folks, I would have "oohed and ahhhed" if this event was six years ago because I knew nothing about finishing wood or drywall. I only took two pictures because I was impressed by two things. This window in house #1


and Elizabeth in the same kitchen as that window!


Monday, October 15, 2007

A Gift For Me?

I got this in the mail last week.


A gift? For me? What could it be? Open it! Open it! Let's see, let's see!


Huh?

Let me get this straight. If I spend a lot of money at your store, you will give me a year to pay you?

That isn't a gift, that is a loan.

Maybe I could use this loan to buy the insulation we need..... hmmmmm.

Friday, October 12, 2007

The Evolution of a Bathroom

This weeks focus is the downstairs powder room. It is time to get a sink put in but I can't use a commercially produced one because the space I have to work with is too small and we aren't wealthy people. That means we can't afford to buy elaborate basin sinks with designer faucets for thousands of dollars. So we opt for the second choice, design our own with what we have and what we know might work. Since we have lots of wood lying around, some packing tape, caulk, screws and leftover bits from the manufacture of the kitchen and bathroom countertops, the product of choice is.... concrete! The design of which has changed many times in my head over the last year or so. So, let me bore you all by describing the entire process which I should be able to do in an entire paragraph.

This view


used to be this view


and this view from the toilet


used to look like this from the other side (it is the shorter doorway in the center.)


I managed to cover up the plumbing by using this old fireplace cover which I painted this week with black heat resistant paint (because that was what I had lying around so I didn't have to make a special trip to the store to get flat black spray paint.)


This fireplace cover has been moved from room to room over the last 5 years and when we finally realized that we couldn't use it as a fireplace cover we decided that it could be used as a decorative piece or to frame a mirror. About a week after that we noticed that it would fit this bathroom perfectly and could be used as a base to a sink. The fact that the center door lifts out gives us access to the space behind it. So here is where it would finally rest. I framed in the alcove to accomodate this as a base. The design of the fireplace, with the church windows at the base and the faces of monks in the top corners would allow us to follow a Gothic theme for this small space.

For the sink and counter top I have an area in the alcove that is 11" X 26" and the bottom of the sink has a 4" wide well to drop down into if I needed some depth. Making a sink wouldn't be too much of a problem but putting in a faucet might be. So I started looking through decorator books that we bought for 50 cents a piece at assorted library book sales to get some ideas. The first idea involved having counter space to allow faucets to be installed which would cause me to design a basin sink and put a spigot in the wall coming out of a face or some iron mask. This is an early sketch that I made. I can paint in 3-D but I can't draw worth crap! This why I started playing with the hypertufa planters this summer. It was to see what textures and forms I could create while at the same time providing us with some great planters!


So I started looking for a face form to use on the wall and then I saw a picture of a sink that used copper pipe with fancy boiler shut off valves coming out of a wall and thought that I could do that fairly easily. It would give me more counter top space and I could re-design the sink so that it falls into the counter. This is what I came up with


I had no idea where I would find faucets but it was a start. So I started to make a mold for the sink. While doing this and making measurements the design got modified once again and I found this faucet that we had bought years ago for our clawfoot tub (that I have yet to find a room for). This faucet will work perfectly for now and can be replaced with one that looks older if we want to later on since it is a standard type of fitting.


So, here is what this will most likely end up looking like


Now I have to come up with a color scheme to make this pop out, but all that depends upon how the sink turns out. Why? well I did a little more experimenting with the sink and concrete color. In fact, I don't mind telling you that the first attempt at making the sink was a failure. Some valuable lessons were learned though and the total cost of my failure was an old bag of concrete and my time. I shall be putting my mold back together with a few simple modifications over the next few days and will tell you all about the failed first attempt soon so you can all be wise people if you want to try this for yourself.

In the meantime the failed sink will get stuck outside with E.L.V.I.S. but somehow I don't think there is a market for scrap concrete!

Thursday, October 11, 2007

Another Shellac Moment

I wish I took a BEFORE picture of this light fixture. We bought it for $6 I think and it used to be painted beige with some highlights of green and pink airbrushed in certain spots. I might try to use it in our Gothic Powder room that I am going to tell you all about in the next installment. My original plan was to paint it black and gold. When I got all the paint off it I saw that it was made of pressed brass so I tried something that I read in our 1909 Book of Household Discoveries. I mixed "Gold Varnish" using 1/4 teaspoon of turmeric in a half filled babyfood jar of thinned clear shellac. This gives the shellac a yellow translucent hue. I applied this "Varnish" directly over the brass in three coats and got this


I don't think I will be using black paint on this any time soon. Now what did I do with the brass door hardware?

Sunday, October 07, 2007

Another Milestone Reached.

The worlds heaviest bathtub shall henceforth be known as E.L.V.I.S. (Extra Large Volume Iron Soaker).
E.L.V.I.S. has left the building!


Thank you. Thank you very much. Thank you.

Saturday, October 06, 2007

I've Been Keeping a Secret

That's right folks. I haven't been up front and honest with all the "Crack House" news for the last couple of months. I've been holding back on you. Remember how I applied for my permits to line my chimneys back in July? Well in August we took a drive to Cincinnati to visit "The Fireplace" where we bought one of these and one of these. Which is why we couldn't afford a trip to Brimfield in September in case anybody remembers our plans to go.

I haven't mentioned them because we had to get our chimneys inspected before they could be installed and they have been sitting in the center of the floor for months making it difficult to maneuver through certain rooms.


My chimneys are fine, though we still have three more to line, and so these babies can be installed. I got the big one in today by myself, even though it weighs close to 400 lbs. All I have to do is run an electric line to a splice box in the basement that feeds the new socket that I had to install to run this thing and fill it with corn or wood pellets (or wheat or sunflower seeds) and fire her up! You know what we're going to have this year that we didn't have last year? HEAT! And we control the bill!


Here is the money shot;


The smaller one will be installed in the bathroom. You know, the one with all the marble tile that freezes every year. I have to figure a way to rig up a socket and run some thermostat wire because there is no way I am tearing up that tiled floor!

Friday, October 05, 2007

The Butchering of my Trees

Dayton Power and Light must have contracted with the ABC Professional Tree Service to clear the branches away from the electric lines that run down the alley beside the house. These guys drove a large truck with a hydraulic lift basket pulling a heavy duty wood chipper which they used to mulch all the branches. They went down our alley on Tuesday afternoon and when they filled the back of their truck with mulch the guys started to rake the excess leaves onto our property. One of the guys walked this pile of wood across the alley from another property and dumped it in the brush on our slope.


When they came back they did this to our trees;


And left this in my bushes;


They call themselves ABC Professional Tree service! Beware of people who advertise how professional they are.


Four of my trees are going to have to come down now because they have been butchered so badly and look awful. Some of these limbs have been cut a good fifteen feet below the power lines. I'm sure these guys were contracted to clear the trees from the lines and not clear the trees from the alley!

I think it is great that someone could be so considerate as to leave me a chainsaw in the brush beside my van! Especially this week!

Thursday, October 04, 2007

A Gift From an Asshole!

After the break-in debacle we decided that it was finally time to clear much of the back yard and alley of weeds. I pulled out the recently acquired Stihl weed whacker with a metal blade attachment to cut through the host of small trees that are popping up all over the yard. When I got to the location of the former garage where the "Beast" sits (my 1975 Ford Econoline Van that I haven't tried to drive for a year) I had a whole lot of weeds to whack, a bunch of empty cigarette packets to pick up and several empty pop bottles to dispose of. When I hacked and slashed my way to the passenger side front wheel I found something that I REALLY needed!

Sitting right there on the ground was a 42cc Poulan Pro chainsaw with... wait for it.... a plastic chain cover. Can you believe it! Only one day earlier someone had stolen mine and now someone leaves me an exact replacement. It even leaks gas just like my old one did.....

Wednesday, October 03, 2007

Assholes!

Once again the "Crack House" was broken into and once again it appears that absolutely nothing was taken. This marks the third time such a thing has happened. Today the assholes broke the window to the kitchen door and when they realized that they needed a key to get the door open they broke out another window and a mullion and climbed through the opening. I suspect they were kids because that opening measured 15" X 25" and I wouldn't want to climb through it. They went out the door in the back that leads to the basement after undoing the deadbolts and moving the 2 X 4 that jambs that door shut.

I have no clue how many rooms they went through or if the radio blasting away spooked them. Maybe it was our ghost! All the tools were intact (as far as I could tell) and since most of them are old they have little value. The door is fixable and I have lots of old glass so the cost to me is my time. No point in reporting this crime because the police can't do anything except take a report at their earliest convenience which isn't convenient to me and our insurance deductible is so high there won't be any claims. Since it was about 10:00 PM when I stopped by to put the garbage can out I boarded up the broken windows and secured all the other windows in the house and went home to have a beer. I will re-evaluate the situation early in the AM.

This kind of petty crime drives people away from Dayton. In fact, since I have lived here (13 years) I have had at least 7 garage break ins 2 car break ins, an antique motor scooter stolen and three attempts to break in at the "Crack House" but nothing of value has ever been taken (except the scooter which I couldn't get insured for damage and theft because of it's uniqueness). I have realized this though. With all the hassle of fixing the damage, meeting insurance deductibles on the cars and filing police reports it is still cheaper to live here than any of the suburbs or even a different state. If I bought a house of comparable size to either of the two that we have in any other location, we would have to pay out more money in mortgage interest over 30 years than it would cost to pay deductibles and send my child to private school. In fact, if you live in the region and plan to send your child to private schools then you should live in Dayton because you will pay out less money in real estate taxes on a larger home! Tax money that is used to support the public school system. If more responsible people would move here there would be fewer homes for irresponsible people to occupy and petty crime rates would go down because we have fewer assholes in our city.

**UPDATE**
Something was bugging me this morning when I woke up. I couldn't remember smelling gasoline when I stopped at the house last night so I ran over there early this morning to see if my hunch was correct. It was.
The assholes stole my chainsaw. They left the case that it was sitting on but took the blade cover, go figure that one out. Well, I hope it leaks as much gas on them as it did on me!

Monday, October 01, 2007

Look at the Size of THIS!

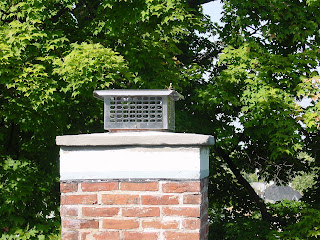
My chimney is all nicely insulated with vermiculite and capped off with my floating cement cap and this stainless steel chimney cap. Nice, eh?


Now look a little closer..... what's that on the corner?


That is the biggest preying mantis that I have seen in years!

The city inspector will be out today to poke his head up my chimneys that have been lined to let me know if they are usable. He will be the same guy who approved my plumbing rough in 4 years ago. The place has changed a lot in 4 years!

Stay tuned, lots of exciting things to report this week, including how I am attemting to make a concrete sink for the downstairs powder room.