When you rewire an old house and have to install electrical boxes where they are awkward to install, well, they don't always lay flat. I had to put some really skinny boxes in our breakfast room because one of the walls was brick and the other one was 1" planking. Add some 3-way switches and the skinny box doesn't have much room left for wires. The end result is that the switch plates won't screw on flush with the wall. There is a gap that shows up in the form of an ugly shadow. I also have a problem in the hall where a switch was put into the wood molding near the door and in order for the plate to sit flush with the wood I would have to chisel a recess into the wood where the box is screwed on.
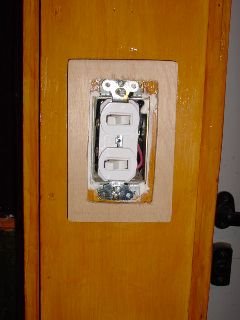
Here is the one in the brick wall.

You can see that the metal on one side of the box isn't flush with the wall. I have the option of removing it and chisling more brick and then replastering the wall to get to to sit flush or I can find a way to fill the gap.
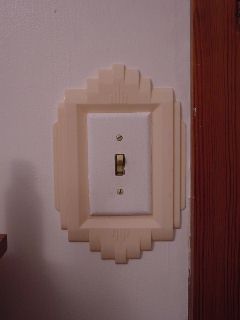
You can go and try to find some of these

but that could take several years if you need a few (and we do!).
I have a simpler solution. I have some very thin plywood that I cut to sit around the electrical box and under the switch plate.

I plan on painting two of them green and putting shellac on the third but I guess you could really do some fancy stencil or rubber stamping on one of these if you wanted to. Call it a creative solution to a simple problem.... it works for me!


I had to do something today, the temperature outside was 52 degrees! Inside it was 44 degrees and after 5 hours with the windows open it got up to a whopping 46!

2 comments:
Gary,
Thats a really good idea. I have several switch boxes in my house where they cut the hole in the sheetrock bigger than what the switch plate will cover. I filled the gaps in with Great Stuff but haven't ever gotten the resulting surface to look right. Maybe I'll try a two stage cover like you have.
SD
I realize that this post is nearly 10 years old.. BUT....
It's a good idea to make sure that your switch boxes do not exceed their maximum fill rating, which is usually stamped on the box. the total fill for all components/wires/connectors can be calculated using values specified by the NEC.
As far as correcting oversize holes in drywall around light switches and outlets, there is really only one permanent solution: you need to cut a section of the drywall back (at least 6" wider than the electrical box) to studs and install a new section with a properly sized hole cut for your electrical box. fixing some properly sized horizontal supports cut from 2x4's above/below the box and attached to the studs may also help. Trying to fill the edges of the oversized hole with drywall compound will almost always end up cracking and crumbling.
Post a Comment