
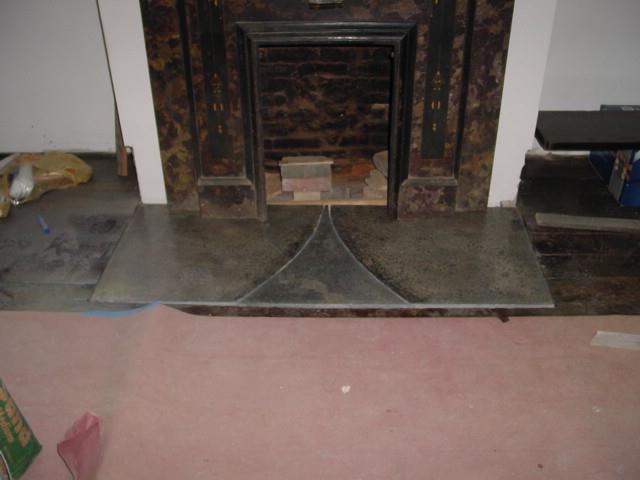
TA DAH! The hearth in place but requiring grout in the joints.
(Drum roll again....)
TA TA TA DAH! The counter top in place but requiring the sink and faucet to be installed.
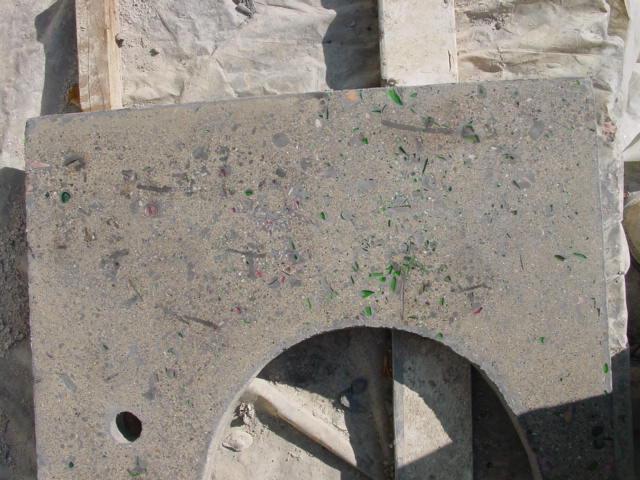
For those of you who are REALLY interested, the close ups.
Now, we are so happy with the way this came out and I am going to be making a backsplash for it in a week or so.
If I were to do it over again, I would have thrown more glass in because much of it didn't appear in the final result and is probably sitting just below the surface. I would also use flat pieces of glass instead of curved pieces that are produced when you smash a vase or a tumbler. Now, in case you are wondering, you can buy recycled colored glass in bulk for countertops. The price was about $65.00 for a 50 lb. bag with a minimum order of $150.00. I didn't need that much glass so I chose the "cheapass" route! The other tip I have is this; have a spare set of diamond polishing pads on hand if you plan to do a lot of work. My first set of pads wore out and so I had to pull out my spare set. If you don't have a spare set it is not likely you will have them in time to do your work before it becomes too hard to grind. So plan ahead. A set of pads will cost about $100.00 on Ebay. So the actual cost of this concrete work was about $115.00 since I had the melamine for the mold left over from the kitchen counter pour and the tools, etc.
You know, making and polishing rock 20+ years after graduating from college I can finally say that I AM doing something with my Geology Degree!
2 comments:
Let me guess, did you also have a rock tumbler as a kid?
Counter and hearth look great. My only worry is that they will be too heavy. I'm building the cabinets myself, remember. I'm not saying I'm a bad carpenter, but still, I'm not sure I'd sleep well for the first week or so.
I didn't have a tumbler but I remember wanting one. I did have a nice fossil collection though.
The book about concrete countertops tells you how to reinforce your cabinets to take the weight. I think they used plywood braces. I put L-brackets on the wall for this counter and then screwed a sanded and shellacked real old 2 X 4 below the horizontal brace so that it looks like the counter rests on the wood and the brackets are hidden. I could have put the wood directly to the wall but I would have needed some 4" screws and I don't think I could drill a pilot hole through the wood it was so tough. A piece of 3/4" plywood attached to the top of the counter as a base to the concrete will distribute the weight evenly across the surface. You can also reduce the weight of the concrete by using perlite as aggregate or pieces of styrene placed in the mold to reduce the volume of concrete.
Post a Comment