
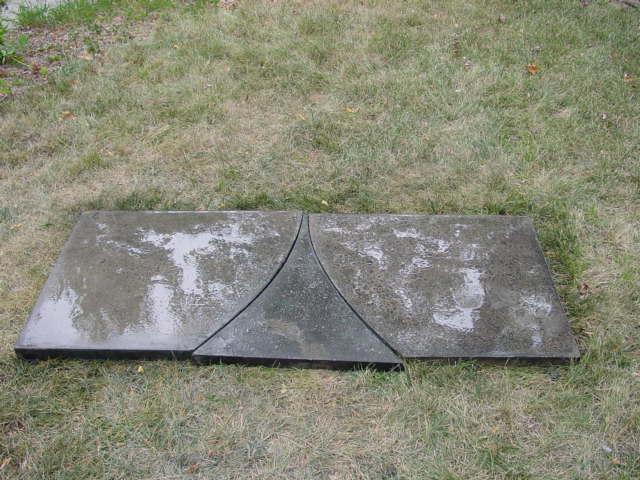
On Sunday I got to grind my concrete pieces. This creates more holes of course, but holes are good because they actually allow you to alter the appearance of the concrete. You can also fill them with a slurry of a completely different color or even colored epoxy. I am way too traditional to put bright colors in my voids, besides, I am trying to make my pieces look more like polished stone. So today I was able to grind all my pieces to 800 grit with the diamond polishing pads and slurry my pieces to darken the color of the concrete. The fireplace hearth went from this

To this with an almost black slurry on all the pieces.
I gave up on the plum color on the central piece and went for black and blue marbleized look but the acrylic paint weakens the bond and integrity of the cement due to how much I had to use to get the color. The book actually states this so it was no surprise. The slurry helped to level the surface and as a result reduced the amount of blue in the piece. That grey streak is the hardest section of this piece. Here are close-ups.

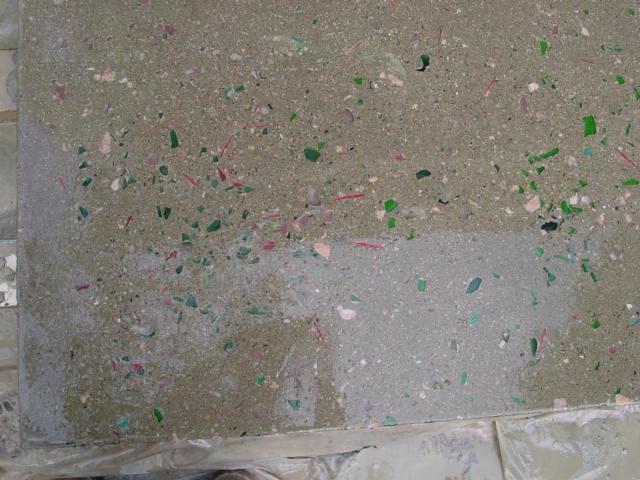
These pieces are wet so that you can see how they should appear when polished and waxed.
After much grinding the counter looked like this.
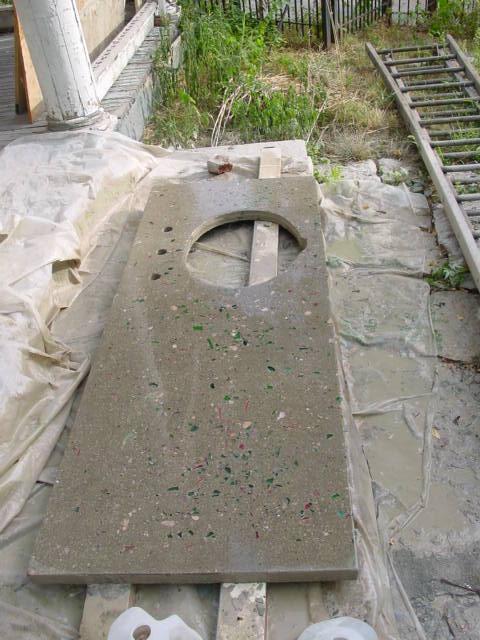
I put a dark grey slurry on this to fill the voids around the glass chips and not make such a drastic color change to the concrete. On Wednesday I will grind again with the 800 grit disk and melt the wax slithers and any polypropylene fibers on the surface of the concrete with the butane torch and then slurry with a black mixture. I also have to grind about 1/8 inch of the front notch of the sink hole so the sink sits flush. I was using a tile saw today to make a series of grooves that I can take a cold chisle to on Wednesday. Here is a close up before the slurry was applied, the final color will be darker though.
Stay tuned, the final finish won't be until next weekend. I wonder if Elizabeth's hair will stay up that long? It might if we don' t wash it!
8 comments:
Wow, that's pretty amazing - Looking good! I like the pink and green glass in the bathroom counter.
Pretty cool. So what do you grind it with? You wrote, "diamond polishing pads", but what sort of tool is it? An angle grinder or something else?
very cool. You taught yourself this from the book right?
This winter I am planning to start teaching myself to embroider-cross your fingers.
i like the glass as well. I can't recall what kind of sink you are using...
Greg,
The concrete is polished with a variable speed grinder/polisher (angle grinder)using a set of 4" velcro backed,diamond polishing pads that I got on Ebay for $92.00. The grinder was used to sand the edges of my floors saving me having to buy/rent an edger and we used it to wax the cars too! The total cost to make the kitchen counters was about $400 for tools, melamine for molds, concrete plus additives and the book etc. To make these pieces here the cost was about $15.00 for the concrete since I had the tools and additives.
Tell El-Broko that if needs to come up with the $$$$ he had better go to the Eureka branch of the "Dewey, Cheetham and Howe" Bank and have a chat with the Loan Arranger.....
Gary,
You said you don't have the necessary tool for agitating the concrete in the molds in order to get the air out. What sort of tools could do that? I'm wondering if an upside down drum sander or similar would serve.
that looks like fun. Is it? Or is it just hard work? I'm thinking if I can convince the bride that it's fun, she might take it up and save me the cost of stone...
OK, to answer the last two questions. I used my palm sander to vibrate the mold but you need something with a little more power. I also used a rubber mallet to rap the sides with. If I had the mold on a table it might work better but I have them on the ground.
If you like being creative or artistic, this is fun because you don't know what will happen and you can alter the final piece as you go along. Plus you have a one of a kind piece of custom work that you made.The only hard part for me is having to bend over to grind and polish. If the counter was poured on a bench it would be much easier to grind. The smaller hearth pieces are easy to do. I just sit or kneel on the grass as I work on them. You know, everything has perspective. After hauling 60 bundles of shingle up to the third floor and then up a ladder or out the side window to the lower roof and putting on a new roof during my first year of owning this place, nothing is hard any more. It may be a hassle but it rarely is considered hard by my standards.
The hard part for me is sitting here at work, reading your blog when I'd rather be at home pouring my own counters! I have a job that involves a lot of sitting, waiting for the call that means I will work furiously before waiting again.
I also know what you mean about how owning an old house changes your perspective of what hard work or at least house work is. I remember a coworker telling me how she had sooo much work to do when they moved into a three year old house. They had to paint every room. Horrors!
I got "The Book" and have read through about half of it. I plan to build a cement surfaced work table for my pottery studio and polished concrete counters when we get around to the kitchen. Based on your latest advice I'll build the table first and use it as a platform for my counter molds.
Post a Comment