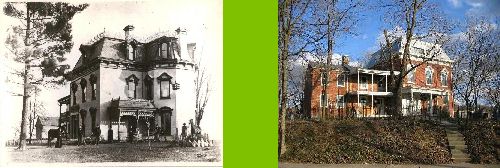
This will appear to be overly simplified but you have to realize that I have already stripped my windows and I am at the point where I am putting them back in. I will use my dining room windows for explaining this project because those are the ones described in my windows 101 posts. The windows have all been finished and completely re-glazed. The frames have been sanded and primed with Kilz but require some wood sill replacement since they were butchered back in the 1960s. They still need to be faux finished like the interior sides of the windows using aniline tinted shellac over beige paint. I am trying to get to the point where the beige paint is applied. This means that I had to replace the sash cords in both windows and rip some new blind stop on the table saw in order to get to that point. I was also missing 4 sash pulleys from one window and was able to scrounge some turn of the century (20th) pressed steel pulleys which I decided to use for the upper sashes in both windows since they would be the least visible. The original 1845 pulleys would accomodate the lower sashes of each window since they were visible upon inspection by a purist!
I scored about 100 feet of cotton braided sash cord a few years ago for $3 at an antique mall and used most of it up on the three living room windows. I didn't have enough to do both dining room windows so I decided to use cotton on the lower sashes and nylon on the upper sashes. I can always replace the nylon if I score some more braided cotton in the future which I hope to do because I need about 50 feet for the two parlor windows. You will never see the nylon unless I were to lower the upper sashes.
All my pulleys were removed stripped of paint and oiled to ensure smooth operation and NO squeaks. The access panels on each side of the windows were removed to gain access to the weight boxes and the weights. (Note. In order to access these you must remove the blind stop partition between the two sashes.) The weights were removed and wiped of 160 years of black crud, mostly on my pants (did I mention I'm really a slob?) and the old cords removed. Some of these cords were likely the original 1845 sisal twisted cord. Now, in order to thread a new cord .... oh crap! Is that the time? Sorry folks you will have to wait. It is after 1AM and I turned into a pumpkin an hour ago!

3 comments:
I'm jealous of your access panels.
You have to pry the trim off our windows to gain access to weights in the Devil Queen. Every other old house around here is like that too. I can't decide if we didn't get access panels because of economic factors or regional building styles.
In either case, I'm green with envy.
Are you using any type of weather stripping? Our windows don't all fit snug between the stops so they rattle in strong winds and leak air. Suggestions?
John,
My trim is already removed. That is why this sounds so appealing!
Ben,
I have installed storm windows which work great at keeping the cold air out. I may use some of the v-strip adhesive plastic on the sash runs, pushed up against the stops where they aren't so noticable. The "D" shaped adhesive strips work good on the top of the top sash and bottom of the lower sash.
Post a Comment