
Now, in order to thread a new cord you must first have a way to get it to slide down into the weight box. If the old cord is present and intact, then this is easy. You tape the new cord to the old and then cut the knot and pull it down to the weights before removing the weight and removing the old cord completely. I wasn't so lucky. I needed a sophisticated piece of equipment. Here it is in this picture.

It is a weighted cord. In this case it is a weighted piece of speaker wire. As you can see, I used the brace for a ceiling fixture for the weight. (Well, it was the heaviest thing I could find without going into the basement!) The pulley on the right is the 1845 pulley. The one on the left is the 1900 equivalent in much thinner, pressed steel.
So, in this case, I placed my new sash cord through the pulley and taped it to the end of the speaker wire. I fed the weight through one of these holes
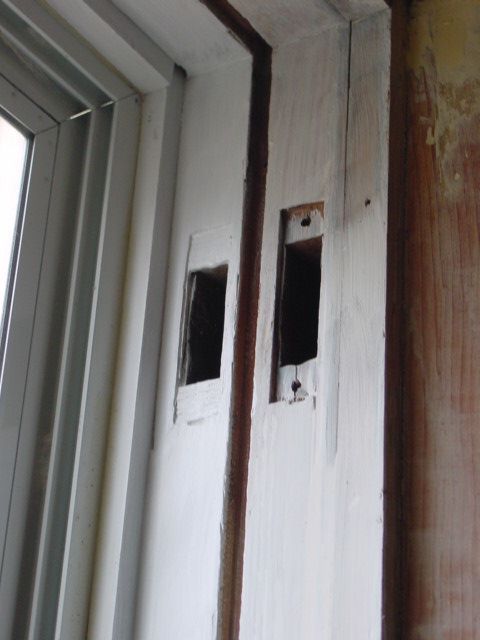
and pulled it out of the access opening near the bottom of the window. I continued pulling until the new sash cord came through. I then pressed the pulley in place and screwed it in position. This cord was then tied to the weight outside of the access hole and the weight replaced into the weight box. At the same time I tugged the cord to lift the weight so that it could spin freely removing any twists in the cord.
Then, standing on a step ladder, I pulled on the cord until the weight was lifted off the base of the weight box and rubbed my now blackend finger on the cord at the top of the pulley to mark it. This is where I need to tie my knot. I cut the cord about 3 inches below this mark and then pulled on the sash cord lifting the weight so as to make a knot that will insert into the knot hole on the side of the sash window. Upon releasing the cord, the knot should be large enough that it will not slip through the pulley and the weight should be suspended about 1 inch off the floor of the weight box.
Now repeat 3 more times for the one window.
The fun part is about to begin. To install the upper sash, you have to pull the sash cords one at a time and insert the knot into the knot hole at the side of the window without dropping the window on the floor! Once achieved, you have to wiggle the window into its sash run and make sure that it moves without sticking. If it sticks you can spray the run with silicon lubricant or do what I do, which is rub the sash run with a bar of soap!
Then you replace, or in my case cut and replace with new, partition (blind stop) molding and repeat with the lower sash. When done, you put the inside stop in place and go have a drink!
You can run into a problem with an older house, as we have. The weight of new glass is greater than the weight of old thin glass. Our upper sash tends to drop on its own because the 6 lb weights on each side aren't heavy enough to support the weight of the window and the lower sash doesn't stay up on its own because the one large pane weighs more than the original 6 pane configuration that would have been original to the window. When I figure out what I am going to do to resolve this I'll let you all know. I could run the sash cord through a bunch of washers above the weights but that's alot of washers. I could keep an eye out for heavier weights too. The 1909 book of everything says to drill holes in the sash run and use corks as stops to prevent the window from coming down.
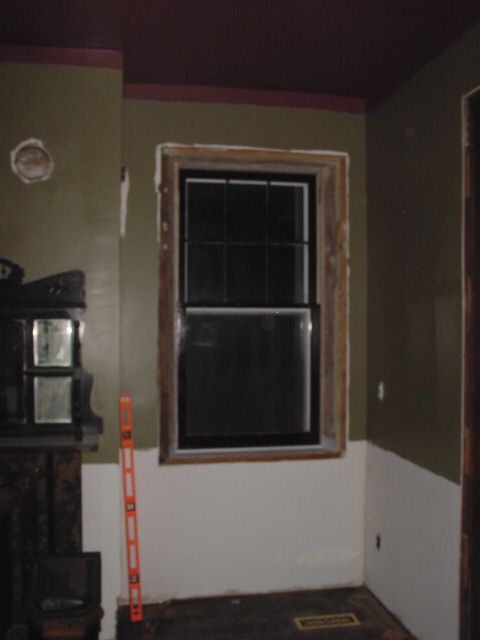
Here is where the windows stand right now. I still have to put in new inside stop to prevent the lower sash from swinging out.
This evening, in a mere two hours, I was able to get the sash locks and lifts installed on these two windows and I replaced four 3-way switches with dimmer switches. The rooms now have ambiance! No more glaring lights!
The sash locks are cool. I got a bunch of circa 1860 locks on ebay last week. I'll post a picture of them when and if the BIG EBAY ACQUISITION arrives. Which I'm sure everyone wants to see. Stay tuned boys and girls.....
5 comments:
How about adding some fishing sinkers?
I enjoyed your comments regarding the sash cord replacement process. The only thing i found unusual is your comment that the weight of new glass is more than the weight of old glass... my experience is that turn of the century glass is 2.5 to 3x thicker (and heavier)than the 1/16" glass available from local hardware store (our home depot no longer cuts residential glass), and the 1/8" glass (termed 'double thick') available from window&glass retailers is ligter also...
caimanenterprise@yahoo.com
what's the big ebay aquisition?
I really enjoy to read your blog. You have explained very well about sash window products such as sash cord,sash weights and more.
Impressive DIY window restoration! Your resourcefulness with the weighted cord and attention to detail is inspiring.
Post a Comment