
The effect of shellac on old wood is predictable. It makes the wood look finished, but still old. New wood is more challenging because in the hands of a "normal" DIYer it will look newly finished. My problem is that I'm not normal and I don't want the look of new wood if I can help it.
While venting about my plumbing, I went off on a tangent that was not expected at this time. Having already cleaned two door frames I didn't want to rub alcohol on the wood molding in the parlor because I couldn't wash the goop off my hands. So I became creative and prepared the wood for two thresholds. One threshold would be more like a 2 inch step due to the difference in floor height between two rooms after laying tile. The other threshold is wide, long and awkward. It separates the dining room and kitchen and since it needs to be at least 10" wide and over 4 feet long I was going to have to be super creative.
The step threshold was simple enough to make. I used an old 1890s 2 X 4 that cleaned up and sanded quite nicely. The uneven surface adds to the rustic appearance of the two rooms it separates. Three coats of some tinted shellac and here it is;

The large threshold was made from 5 oak floor boards left over from the upstairs hallway. The edge strips had to be cut on the table saw and then planed at an angle so that they rise up from the floor at a shallow angle. They haven't been installed yet and the edges have to be cut flush with the baseboards that have yet to be installed but here is a picture to give you an idea of what it looks like. Of course your favorite little "munchkin" had to be in the picture!

I used some slightly tinted amber shellac. I only have one color of aniline dye, walnut. I added a little to darken the color of the amber shellac. After 5 thin coats over the natural oak boards it produced this.
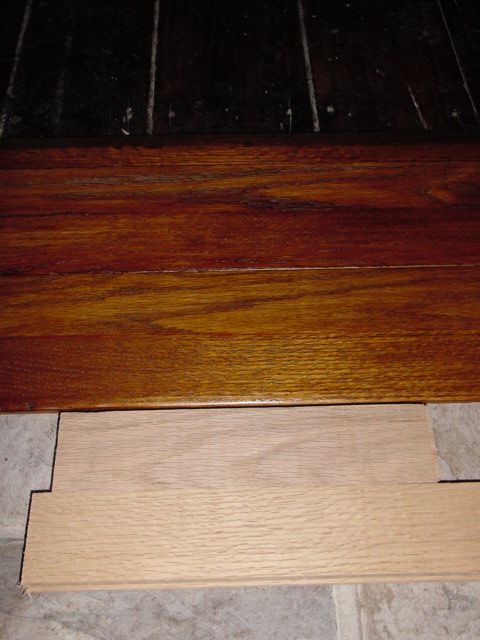
The original cut offs of the oak flooring are also in this picture for comparison.
So, throw away the stains and urethanes, they can't make oak look like this!
To put this into context using modern materials, it would be like adding raw umber pigment to urethane varnish to create a topical type stain. Urethane would take 3 days due to drying time, shellac took 3 hours. You know, three years ago I didn't know what shellac was!
1 comment:
Gary -
As always your staining and finishing looks great. I was Home Depot the other day and I couldnt find shellac - where do you buy it and also the dye that you add? Thanks!
Post a Comment